The time has finally arrived to start planting into the SF beds.
Here is a list of what I planted and where…
* Bed 3 -Row 8 -Squares 1 and 2 -Japanese Spinach-Spacing 4 inches-Total 9 in 1 sq ft
* Bed 4 -Row 1 -Square 1 -Onion Sets White -Spacing 3 inches-Total 16 in 1 sq ft
* Bed 4 -Row 1 -Square 2 -Onion Sets Red -Spacing 3 inches-Total 16 in 1 sq ft
* Bed 4 -Row 1 -Square 3 -Onion Sets Yellow-Spacing 3 inches-Total 16 in 1 sq ft
* Bed 4 -Row 2 -Square 3 -Garlic Sets -Spacing 3 inches-Total 16 in 1 sq ft
* Bed 4 -Row 3-Square 1-Garden Babies Butterhead Lettuce-Spacing 6 inches-Total 4 in 1 sq ft
* Bed 4 -Row 3 -Square 2 -Baby Leaf Lettuce Cutting Mix-Spacing 4 inches-Total 9 in 1 sq ft
* Bed 4 -Row 3 -Square 3-Farmers Market Lettuce Blend-Spacing 4 inches-Total 9 in 1 sq ft
* Bed 4 -Row 3 -Square 4 -Ruby & Emerald Butterhead Lettuce-Spacing 6 inches-Total 4 in 1 sq ft
* Bed 4 -Row 7 -Squares 1 and 2-Catalina Baby Leaf Spinach -Spacing 4 inches -Total 9 in 1 sq ft
Example for planting spinach.
Spacing 4 inches for a total of 9 seeds.
Used index finger to make holes.
Click on photo for larger view.

Filled hole with vermiculite to adjust hole depth
and for water retention.

Two completed squares will yield 18 spinach plants.

While I was planting the onion sets my husband and son were putting up the trellis frame on bed 3. They are so good to me.

Next we have to put on the netting.

Onion sets 16 per square foot.

After I completed all the planting it was time to move on to the compost bin. Before I started my weekly turning I decided to see if I had any finished compost in my resting bin. I had an old Rubbermaid container that I wasn't using. I placed a screen over it and forked compost onto it. Turns out I have a little more than half a container full of ready to use compost. All this from yard waste and kitchen scraps. I can't believe how happy a person can get over dirt!

Isn't it just beautiful!

I attended a composting workshop this past Monday. I arrived a little early and was talking to the instructor. He asked me who in my family was turning the compost pile. When I told him it was me he was impressed. I told him it was back breaking work. He then showed me an easier way to lift the compost with less strain on your back. The photo below is how most people will turn their pile by just digging in deep and trying to lift it out and over....

The type of compost bin I have comes with three removable layers. If you have the room when turning the pile you should remove one layer and place it next the existing bin. By doing this you are exposing the top layer, you can then slide your fork in from just below the layer so you are not digging in. Note in the photo below my right hand is all the way down the handle right up against the fork, this gives you better leverage when lifting the compost out. You also need to bend your knees and lift with your legs. I must say it was easier on the back.

That was it for today's to do list.
Time for a tour of the greenhouse...
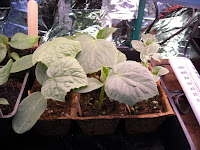
Photo below: Both the zucchini and spaghetti squash are getting their true leaves.

Photos below: The tomatoes and pumpkins are getting so big. I gave them a top dressing of my home made compost and watered them with a light solution of fish emulsion.


Photo below: The cucumbers are ready to be potted up. That will be tomorrows project as well as planting the carrots... if it doesn't rain.
My resident hummingbird was enjoying a late afternoon meal.

Now that the weather is getting a bit warmer and the days are getting a little longer the garden is really starting to wakeup. I'll be taking more photos in the coming days.
...It's not to late to start your vegetable garden.. what are you waiting for...


